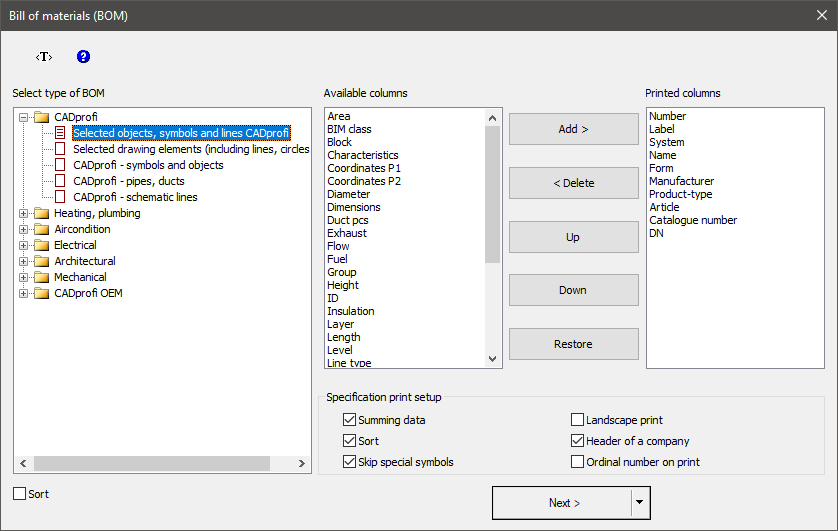
The Bill of materials command allows to obtain various data extracts and printings. The easiest and fastest way to receive a specification is to select one of templates and to directly print it. There are several pre-designed templates to choose from, and they are used to obtain various specifications. Depending on the selected template, CADprofi performs filtering of selected objects. For instance, when user selects specifications for symbols, CADprofi will select only symbols.
Each template provides different data that can be printed in tabular layouts. All needed data are available on the left side of the dialog window. Columns that will be printed are located on the right side of the dialog window. It is possible to select data to the list of printed columns as well as to change the column sequence. BOM can be printed in both horizontal (landscape) and vertical (portrait) mode. For horizontal (landscape) mode, user can select more columns.

Bill of materials (BOM) dialog window
The dialog window contains the following elements:
Available columns - list of attributes, which values can be used in the printed table. The list is dependent on the chosen type of BOM.
|
Hint |
Printed columns - list of attributes that will be included in the columns of the printed table. This list can be later edited by the user.
Add - adds the selected attribute to the list of printed columns.
Delete - removes the selected attribute from the list of printed columns.
Up, Down - allows user to specify the positions order on the list of printed columns. The Printed columns list can be organized also by drag and drop function.
Restore - allows user to restore default list and positions of printed columns according to template lists of BOM.
Specification print setup - options that specify how will be arranged and then printed bill of materials.
•Summing data - enable/disable the creation of a collective bill of materials with summing data of used identical objects. It is also possible to include the line length, ducts area, fittings data etc. in the summing data.
•Sort - enable/disable data sorting on printings. Data can be sorted in the next dialog window that contains the initial printing preview.
•Skip special symbols - enable/disable the inclusion of blocks that haven't got the NAME attribute or the ones for which the NAME attribute doesn’t have any value. Also, in BOMs, blocks that are used to describe the drawing (slope symbols, number of core electric wires etc.), are not included.
•Landscape print - enable/disable the creation of horizontal (landscape) printings.
•Header of a company - enable/disable the printing of the header of a company on the first page of BOM. The data needed for the header and the company logo are being defined in the next dialog window that contains the initial printing preview.
•Ordinal number on print - enable/disable the addition of the column with the order number.
Next - confirms the selected options and proceeds to the selection of objects on the viewport. To select them, user can use all kind of methods in the CAD program. The application itself will filter objects according to the chosen template. Thanks to this instead of selecting single objects, it’s possible to indicate an area with two points.
Collective BOMs
In addition to obtaining bill of materials from the current drawing, it is also possible to create BOMs for projects that contain several drawings. In order to create such a specification, user should make a temporary file in which data from all drawings will be saved. Afterwards, this file can be printed as a collective BOM.
In order to create a file with temporary data, user should press the Save data button. Afterwards user should specify the file, in which the data will be saved. If user specifies an existing file, then the data will be added to the data that already exists. To create a collective data, it is necessary to run the Bill of materials command in each drawing, and to select the same template and save the data to the same file. To print the data from the temporary file, user can use the Open data button.
The temporary file has got a csv format structure, therefore this file can be used to export data for example to a spreadsheet.
Data window
Data window is opened after user has indicated objects.
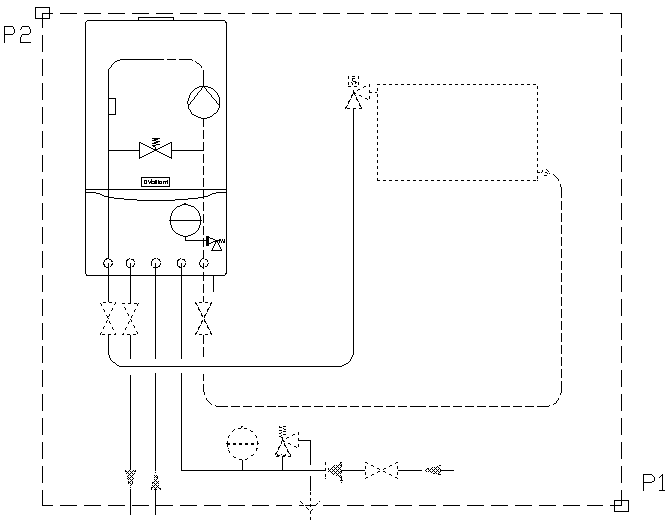
Example of object indication by using two points
In this data window it is possible to sort the data, set the column width that will be used for printing and delete any rows or columns or hide unnecessary data.
To sort the data, user should click on the title of the desired column. Clicking again will reverse the sort order. User can sort multiple columns. In this case, user should first sort columns with the lowest sort priority.
To specify the column width, user should set the cursor between the columns (in the header). Cursor will change into a double-headed arrow that will allow to change the width by dragging. In this way it is possible to completely hide selected columns. This option is useful to hide empty columns or columns that are not needed for printings. . For each list type, program saves the width and arrangement of columns set by the user.
In the preview window user should specify the printing title. It is also possible to define the printing header such as: contact details and company logo.
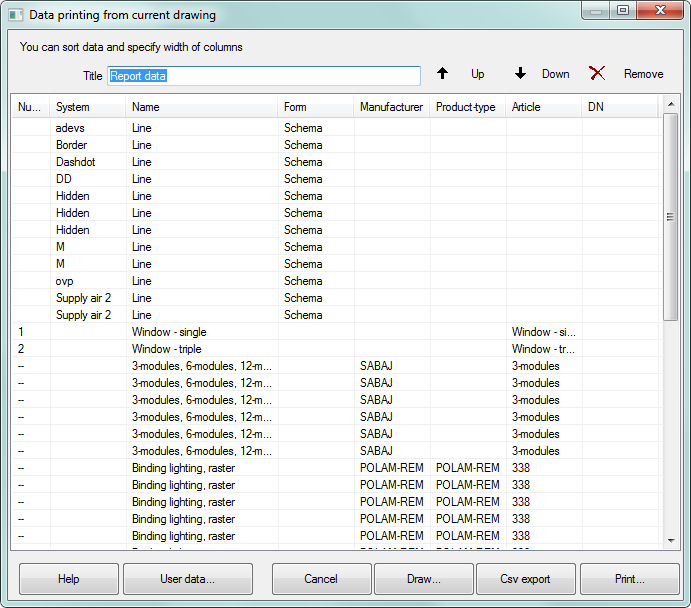
Data printing from current drawing dialog window
Print - allows to print or export the data into many formats.
Csv export - allows to instantly export the data into a csv file, which can be loaded into applications such as MS Excel, Open Office or others.
Draw - is used to create graphical legends and for automatic filling of specification tables.
User data - allows to specify the contact details and the company logo.
Remove - allows to delete rows that contain data. It is also possible to delete data by pressing the Delete button.
Printing/Data export
After clicking the Print button, a window will appear with printing options.
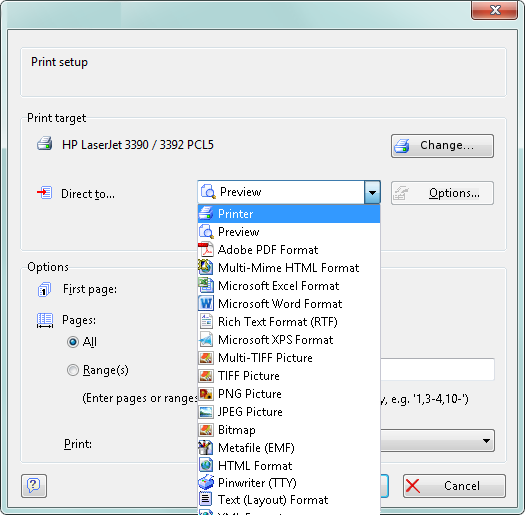
Printing options dialog window
It is possible to directly print the document on a chosen printer or to export the data to various formats (xls, txt, rtf, pdf, html, xml and many more).
A useful option is a possibility to print the first page of specification on another printer than other pages. This option can be used to print the first page that contain the company logo on a color printer and other pages on a monochrome printer.
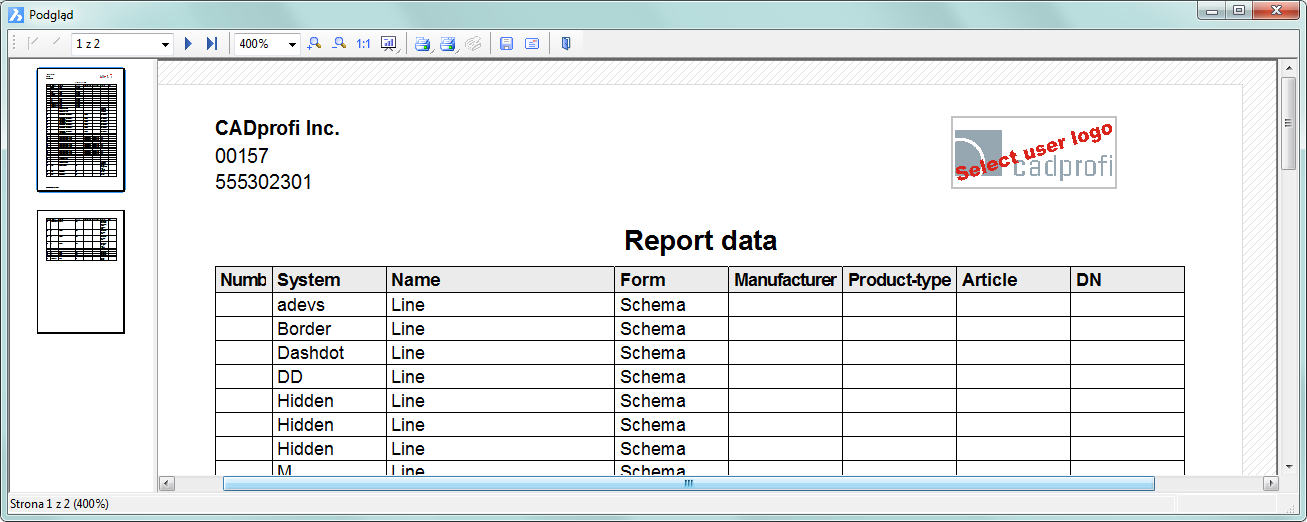
Printing preview dialog window
When user exports data it is possible to specify the export parameters such as only export the data, or export data with used formatting style.
6 Procedures
1.
Run the Bill of materials  command.
2. Choose a template from the list of available templates in order to determine the BOM type.
3. (Optional) Add or delete a position in the Printed columns panel.
4. (Optional) Choose the printing option for specification.
5. Click the Next button.
6. Select objects from the drawing that you would like to include in the specification. Confirm by pressing the right mouse button or the Enter key.
7. (Optional) Change settings in the Data window.
8. Click the Print button.
9. In the newly opened Printing options window in the Export medium card select the printer type that you would like to use.
10. (Optional) Change settings in the Printing options.
11. Click the Start button to begin printing.
1.
Run the Bill of materials  command.
2. Choose a template from the list of available templates in order to determine the BOM type.
3. (Optional) Add or delete a position in the Printed columns panel.
4. (Optional) Choose the printing option for specification.
5. Click the Next button.
6. Select objects from the drawing that you would like to include in the specification. Confirm by pressing the right mouse button or the Enter key.
7. (Optional) Change settings in the Data window.
8. Click the Print button.
9. In the newly opened Printing options window in the Export medium card expand the list Directly to… and select Microsoft Excel Format.
10. (Optional) Click the Options button and go the Result card. It disables the Export data only from objects table option to save formatting.
11. (Optional) Change settings in the Printing options.
12. Click the Start button to begin the data export.
 Creating specifications
(Mechanical)
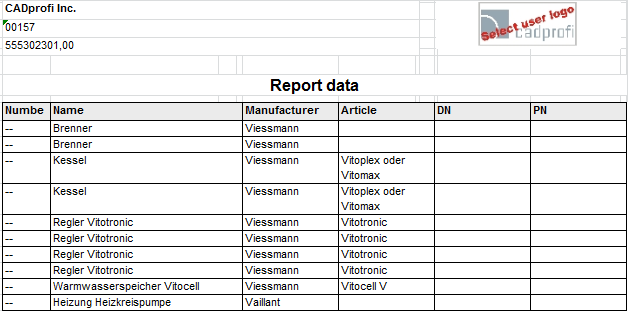
Exporting to Excel with preserved formatting style
|
Hint It is also possible to export the data to the Excel program with the „Export csv” button. |