The Symbols - process control command allows to design control-measurement systems and industrial automation by using multivariant symbols such as measuring points, sensors, transmitters, controllers etc.
Each, individual points (elements) of the scheme can be automatically numbered. They are also used to determine various markings.
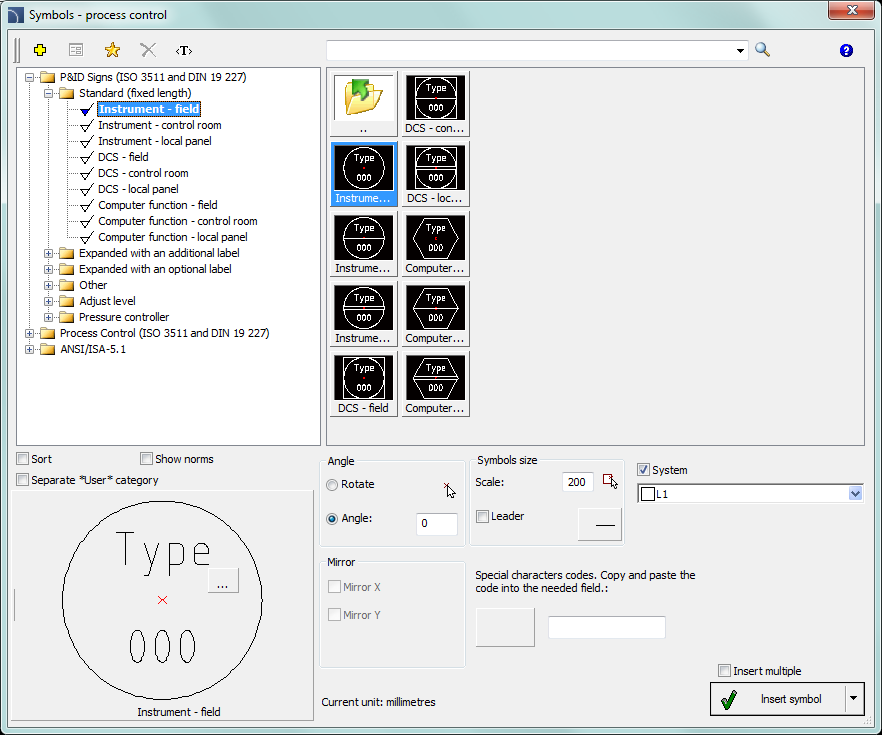
Symbols – process control dialog window
Basic functionality and options regarding symbols are described in the Symbols - IEC, NFPA) chapter. Additional options for the Symbols - process control:
Numbering and marking fields – for each symbols different fields are available, that are used to add additional markings, symbols variants or numbering.
Special symbols codes
field – gives the possibility to display the code of the selected symbol
so it can be copied and pasted anywhere into a text field.
List of symbols
is available after pressing the  button.
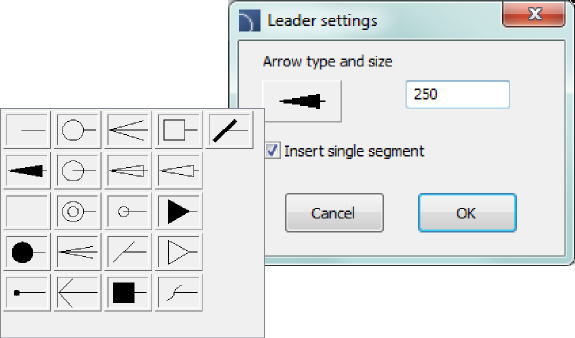
Leader –
enables/disables usage of leader for descriptions. By clicking on the  button, that symbolizes the currently set
arrow type, user can change the following leader settings:
button, that symbolizes the currently set
arrow type, user can change the following leader settings:
•Arrow type– symbol that is inserted in the leader starting point for example an arrow.
•Arrow size – determines the leader scale.
•Insert single segment –drawing of a one or multi-segment leader.
Procedures
1.
Run the Symbols - process control  command.
2. In the Symbols - process control select the desired symbol.
3.
(Optional) Specify additional markings, numbering method etc.
For certain
fields you can select the value from the drop-down list.
The  button will allow you to select the value
in an additional window.
button will allow you to select the value
in an additional window.
4. Specify the rotation Angle and Scale.
5. (Optional) Enable and change Leader settings.
6. Enable/disable the Insert multiple option.
7. Click the Insert symbol button, to insert the marking into the drawing.
8. Symbol can be used to mark other objects, therefore indicate an object. Depending on the selected marking type, from the selected object user can retrieve data that can be used in the inserted marking.
9. Wskaż punkt wstawienia symbolu oznaczenia.
10. (Optional) Specify the symbol rotation angle.
11. Symbol will be inserted in accordance to the selected settings.
12. (Optional) If in the dialog window the Insert multiple option is enabled then repeat the steps 8-11 in order to insert an additional mark or end the command by clicking the Esc key.
